
This random move Illustrator script is a great way to scatter a bunch of objects in a random but controlled way, allowing users to create non-repetitive but still cohesive patterns.
Randomize Mode
Randomill can randomize position in Adobe Illustrator with configurable X,Y ranges and step sizes. Independent properties such as stroke widths or fill patterns can also be repositioned independently.

Randomly move and change the position of all selected objects in Adobe Illustrator
This random move illustrator script works by applying a randomly generated offset to the current position of each selected object. All of Illustrator’s distance units are compatible, and can be used interchangeably. Dial in the settings by entering minimum and maximum range values for horizontal and vertical offsets. This random position function is compatible with every type of object in Illustrator.
Use a step size to further dial in your desired result
Using a step size value can really hone in your desired outcome by changing which values between your specified minimum and maximum position offsets can be selected. By default, objects are moved vertically and horizontally anywhere from -72 pts, to 72 pts. The step size is 18 pts by default. This means that objects will move either left, right, up, or down a maximum of 1 inch. The 18pt step size means that objects will move in increments of 18pts, or a quarter inch.
A note on performance with large numbers of objects
Please note: randomizing the position of large sets of objects (thousands of objects) can take a very long time, or could potentially even crash Illustrator. This is due to the fact that Illustrator scripts unfortunately trigger a redraw of the document every time object position is changed. Remember to save your work before using this function on large groups of objects.


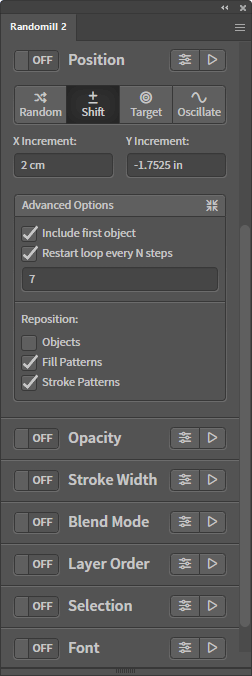
Shift Mode
Loop through objects and increment their position to create interesting designs.

Move an object by a specific amount more than the object before it
This mode can be used to increasingly shift the position of an object in a set by a specified amount more than the previous object that Randomill has iterated over.
For example, let’s say you have four 100pt x 100pt squares all on top of each other and you shift the position of these squares by 10pts in the X direction and 10pts in the Y direction. The result would be:
- Square 1: Unchanged.
- Square 2: Moved to the right by 10pts, moved downwards by 10pts.
- Square 3: Moved to the right by 20pts, moved downwards by 20pts.
- Square 4: Moved to the right by 30pts, moved downwards by 30pts.
You can restart the loop after some specified number of steps
If you only want to move every other square in the selection, you can set this value to 1. After one step, Randomill will basically think that the next object it comes is the first one, and will therefore move it by the specified amount.
If you want to move every square, and not gradually increase the position offset, set this value to 0. This will essentially turn this into the ‘Transform Each’ function already present in Illustrator, with the added benefit of being able to move only object fill patterns or stroke patterns.
You can also optionally include the first object to be included in the position operation as well.

Target Mode
Reposition each object in a set such that the last object is moved to your target distance. Iterate over a set of objects and move them such that the last object in the selection (in terms of layer order) will have be moved by the target value.

Example: Imagine you have a series of 6 squares next to each other. The top-most square in the layer stack is on the left and the bottom-most square is on the right. If you select all these squares and set the target position to have a 0pt horizontal target, and a -100pt vertical target, here is what the result would be:
Square 1: Unchanged.
Square 2: Moved down 20 pts.
Square 3: Moved down 40 pts.
Square 4: Moved down 60 pts.
Square 5: Moved down 80 pts.
Square 6: Moved down 100 pts.
You can see that as Randomill iterated through the squares, it moved each square in equal increments until the last square was moved by the target value.


Oscillate Mode
Loop over multiple objects in a selection and move them by values that bounce between two numbers of your choice. The result is that each object is moved an oscillating value over a specified number of steps.

Example: imagine you have 10 squares lined up next to each other with the leftmost square being the top object in the layer stack. All squares are at (X, 0). So they differ in horizontal positions, but vertically, their position is 0pts. If you oscillate the Y position of this set of squares from 0pts to 10pts over 3 steps, you would get this result:
Square 01: 0 points vertical movement.
Square 02: 3.333 points vertical movement.
Square 03: 6.666 points vertical movement.
Square 04: 10 points vertical movement.
Square 05: 6.666 points vertical movement.
Square 06: 3.333 points vertical movement.
Square 07: 0 points vertical movement.
Square 08: 3.333 points vertical movement.
Square 09: 6.666 points vertical movement.
Square 10: 10 points vertical movement.
The first square’s position was moved by the From value, and took 3 Steps to get to the To value. Another 3 steps were needed to get back to the From value.
Independently move objects horizontally or vertically
Since object position consists of an X value and a Y value, you can set different parameters for both axes of position. This can result in some really interesting and complex patterns.

